Tick, tick, tick…
Apr 11, 2014 Computers, Electronic Projects, Home Projects, Linux, MythTV, Programming, Rain Barrel
My, how time flies.
I need to catch up on a bunch of stuff soon.
- First, I have started building custom K-Cup holders called the Kupousel. Please check them out.
- I have spent a lot of time with my “new” CNC’ed X2 Mini-Mill. Lots of mods and stuff I hope to post about.
- Sill making Tonal Insanity effects pedals. The mill is helping with them. Started using surface mounted components.
- Got my hands on some Arduino knock-offs and been using them to develop other AVR stuff.
- Built an SMD reflow oven from a toaster oven and a ATmega for a PID control.
- Built (cobbled together) a new spindle for my old router when the Roto-Zip started to give out. It also has less run out so I can route PC board directly now, even SMD stuff.
- Completely re-written my Board Tools program with even more options, partly to take advantage of the new spindle and mill.
- Will be re-re-re-building the rain barrel yet again this year. Last year I tested a control using a pico-power ATtiny13a AVR. Worked well, needs a bit of fine tuning. Main reason for rebuild is the barrel cracked, I moved the garden, and I dropped the solar panel at the end of last year and broke it.

- Building my daughter a loft bed – out of an old desk.
- Rebuilt my MythTV system and got in a fight with the stupid cable box that uses XMP IR protocol. (on going)
- Oh! It has been so long I never mentioned my new main computer: 8-core! AMD “Bulldozer” FX-8120, liquid cooled, msi 970A-G46, 16GB RAM, 1TB HD, Bu-ray burner, 23″ wide screen monitor, running Fedora 19 (20 soon). It F…’IN SCREAMS! Built Android (for A10) complete from source in a few hours! That was why I got it thrown in on a job to modify a Mele A2000 STB into a network/web based, Scent Palette controller. Builds MythTV in about 10 minutes.
Hopefully I will add more info in less than the next 2 years! ![]()
Rain Barrel Controler Design
Feb 27, 2012 Rain Barrel
This is the (current) controller design.
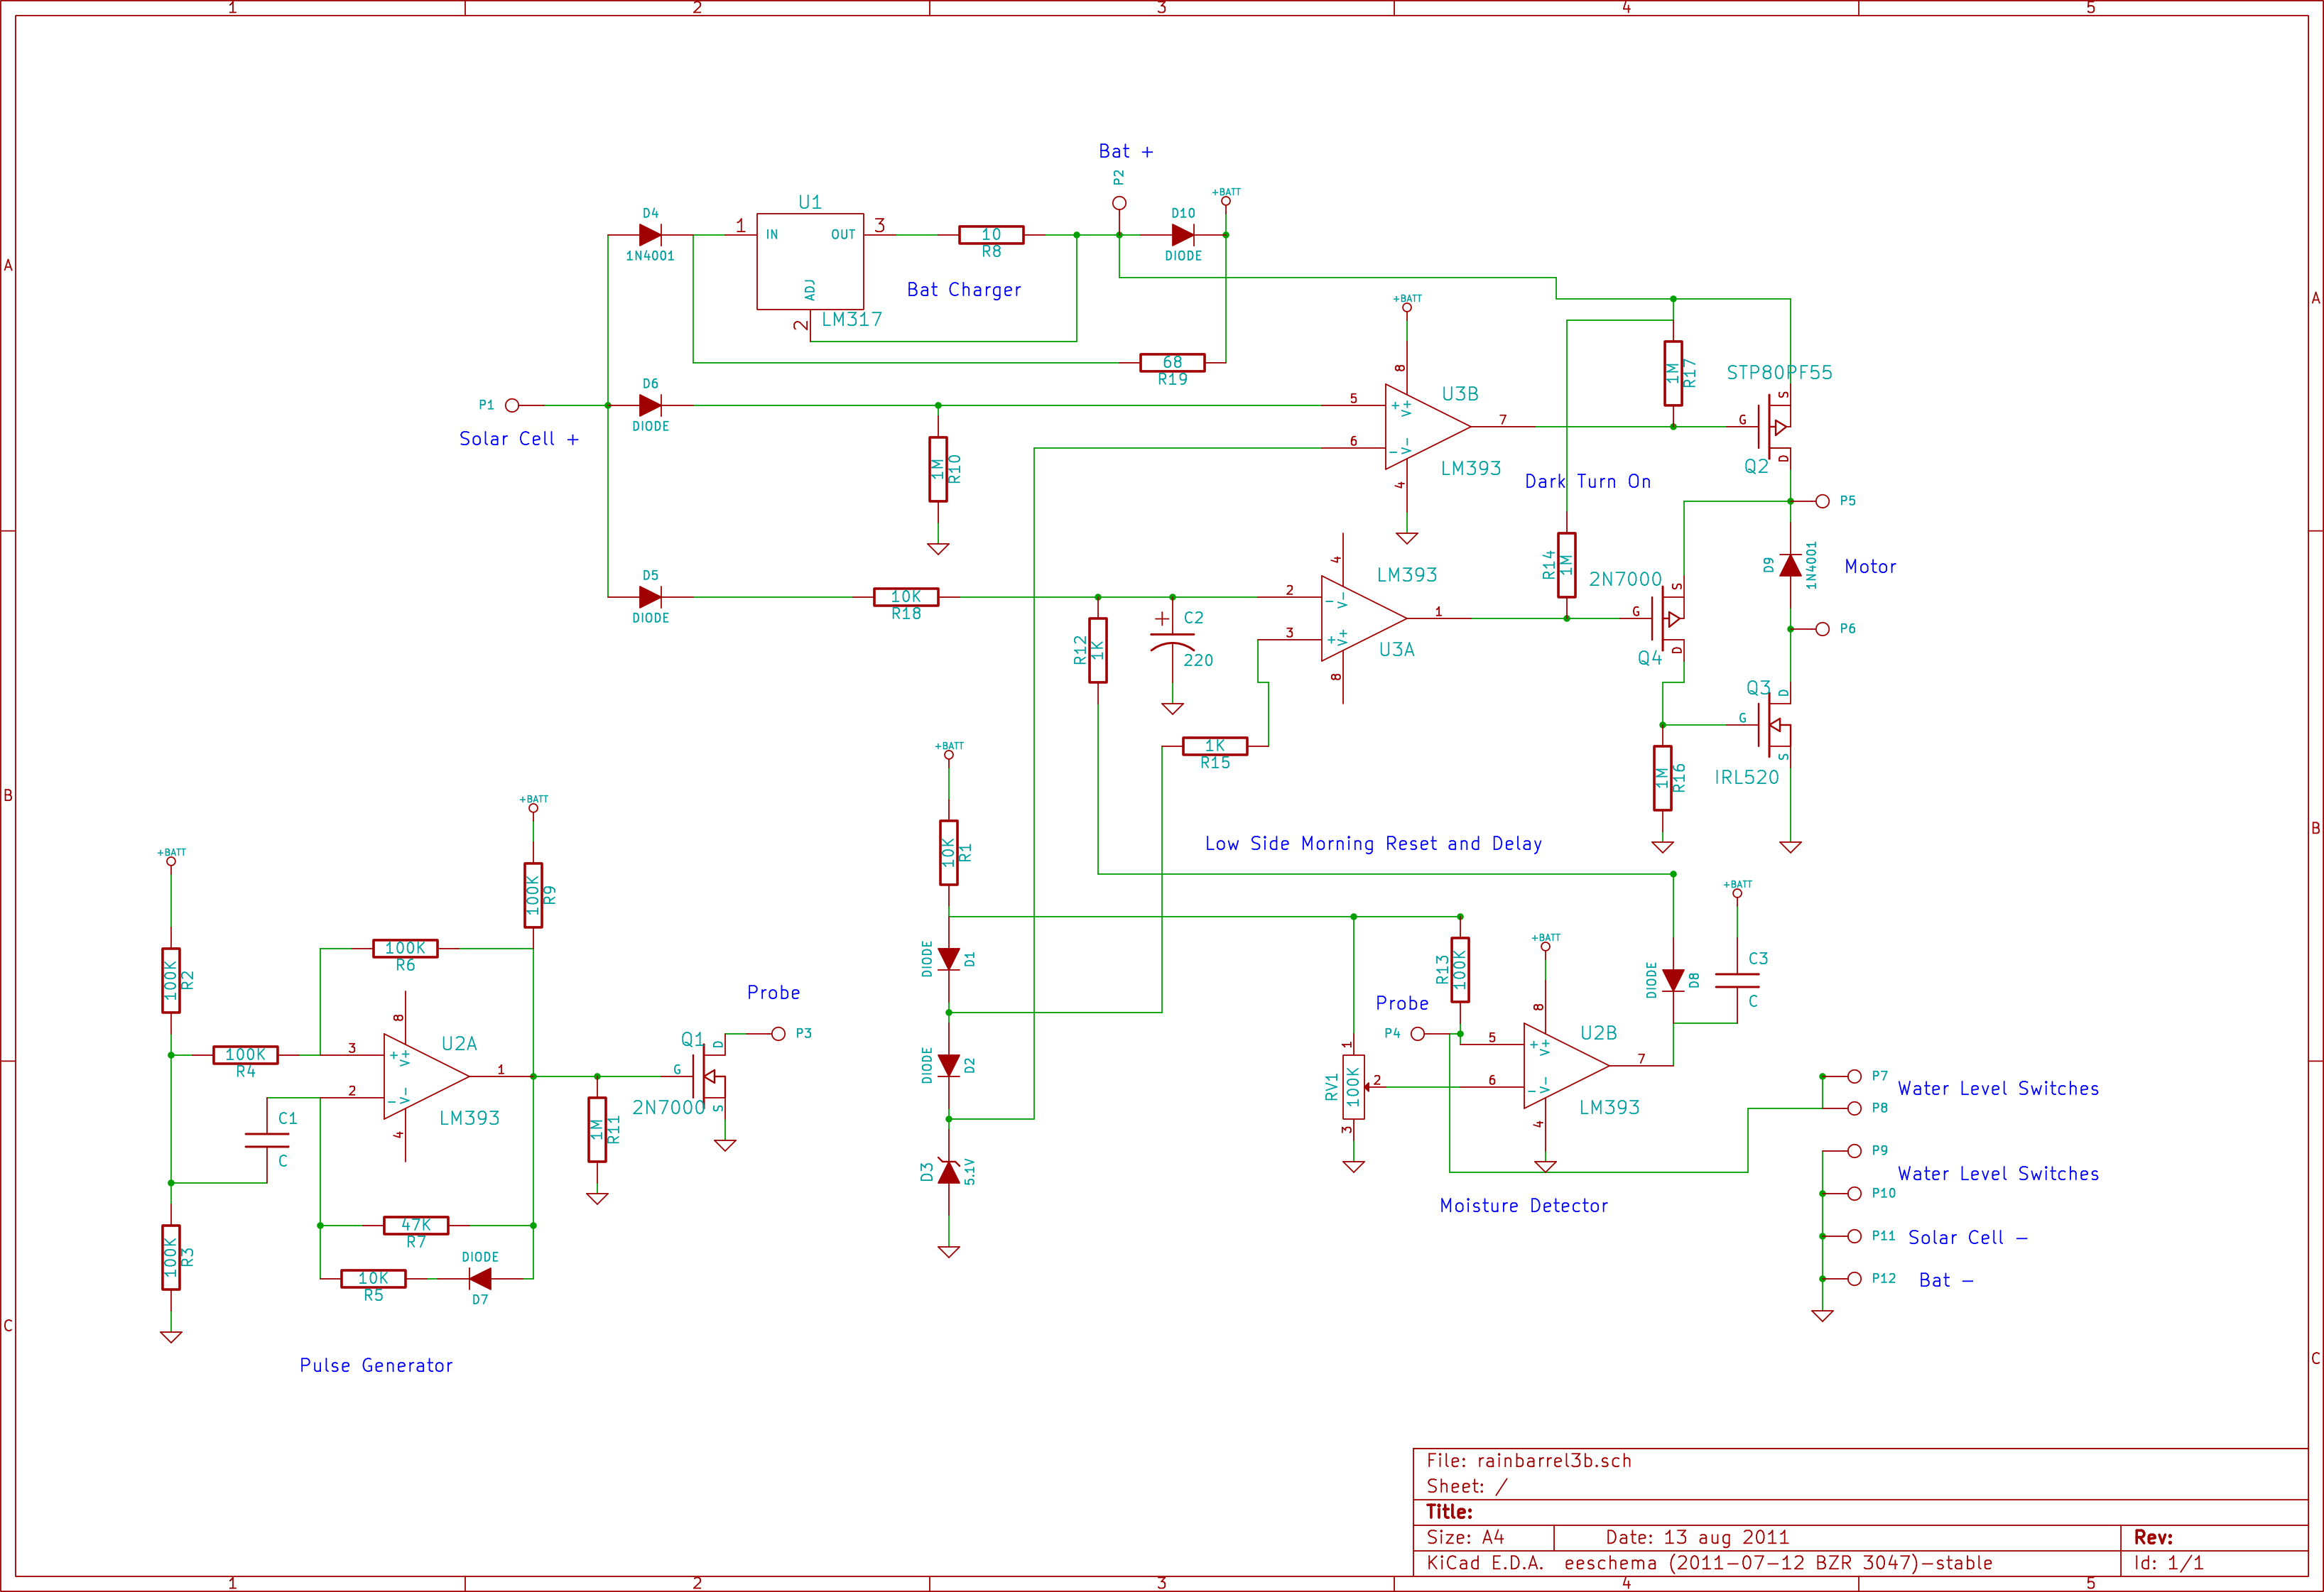
It is very crude and has not been truly “engineered”, but I kept adding bits and trying values until it did what I wanted. Most of the values were chosen from what I had on hand and drove the design.
The circuit accomplishes 3 main functions.
First: Charge the battery with the solar cell.
Second: Turn on the pump at night, run to a set level of water, turn off and not run again until the next night.
Third: Use a moisture probe to prevent running if the ground is wet enough.
The solar cell is used as a light sensor as well as a power source.
Power from the solar cell is fed to a LM317 in a current source mode to supply approximately 125 mA to the 9.6V 1600mAH NiMH battery pack. This provides slightly less than a 10% charge rate based on 10 hours of full sun a day. According to most sources I found, this reasonable charge rate without over charging, since it is time limited by the amount of sun each day and not constant. R19 provides power to supply the electronics while the sun is out, and D10 when dark and running solely from battery.
Tags: controller, electronics, rain barrel
More Barrel Progress
May 10, 2011 Rain Barrel
It has been sitting for a while and seems to be happy!
Had quite a bit of rain, so the moisture probe has not gotten a real good workout yet, but seems to be working. Somebody flipped a switch and today it is near 90 with chance of rain tonight. Same for the next few days, so it may get a few good cycles. Been running on the NiMH battery as well and seems to be holding a charge.
Of course, now I need to tear it down and move it to the garden since I need to put a fence up where it is being tested at to keep the little one in. Planning on rebuilding the barrel and reservoir at the same time to be more appealing and sturdy.
Now I just need to plant the garden!
Scratch That!
Apr 17, 2011 Rain Barrel
As soon as I say everything is working, something blows up.
Today I hooked up a soil moisture probe to test. When I went to adjust it, I found the pump would not run. I know it ran last night because the water level went down in the barrel. (unless I have another leak.)
One of the MOSFETs’s that drives the pump died. I am hoping that when the pump died it damaged it and it finally failed. Replaced it and tested and everything works. Apparently in the process it killed the battery, again. So it is getting another quick charge from the wall charger. Back to the big SLA for now, will switch back tomorrow.
The ground is nice and wet right now from the rain yesterday so it gave me a nice level to adjust to. “This wet, don’t run” There is chance for rain the next two days, so it should not run until the ground drys out. Better weather later in the week so it should dry out in one or two nice days, and I can check the operation again.
Tags: rain barrel
Got Rain!
Apr 16, 2011 Rain Barrel
Finally got some rain, well rain AND snow!
The good thing is the collection system seem to be working. The leak has stopped. The pump is running OK. The battery seems to be keeping a charge. Most of the major components are working.
The last thing to test is the soil moisture probe. I will need some days of alternating wet and dry to give it a test. Oh, yeah, I have to make the probe first! The circuitry is all there and should work, so I just need to finish it up and let it run for a while.
This all means that I am just about ready to start posting some plans on how it is made. Got to go back and clean up drawings and get them into a postable form and do some work on the associated web pages.
I still want to work on the look of it some and make it prettier and easier to build, but all the function is there now.
Looks like it will all be working in time for the growing season. If it ever gets here! Man, look the the size of those snow flakes!!
Tags: rain barrel
Pump Died
Apr 10, 2011 Rain Barrel
The pump did not last very long. Squealed bad then locked up. Drew lots of current and heated up the controller. Did not seem to do any damage.
The good news is this pump can be dismantled so I oiled the bearings and back in business!
The trash can was still leaking so I put a heavy duty liner in it.
Also hooked up a soaker hose to my roses so I would not have to drain the buckets each day.
Still no more rain, so still waiting on that!
Tags: rain barrel
Rain Barrel Progress
Apr 4, 2011 Rain Barrel
I have finally made some progress on the rain barrel. I thought I was going backwards for a while. I have made a new down spout diverter system and it did not seem to be working. Had rain and it was not filling. I have also been testing the new control system, and like wise, it kept failing.
The battery kept going dead and the pump not running long enough. I solved the run time problem, but was starting to think the additional circuitry was draining the battery. I went back to using a SLA that is many times bigger than what is needed and even it slowly went dead. It turns out the solar cell has lost some of its efficiency and was providing enough power for control, but not for charging. It is not designed to be “used outdoors” and I think that it has been damaged by moisture. I replaced it with a slightly better one from Menards that while still not intended for outdoor use, is much better sealed. I will see how long it lasts, I got 3 years out of the original and this one is actually cheaper.
In addition to getting the pump to run longer, I started using a slightly larger pump, also from Harbor Freight. This may be a good thing since they no longer seem to be selling the smaller one. the pump has went form 500 gph to 1000 gph and only draws slightly more current. The only problem is this one is a few years old and the bearings are squealing. Again, I will see how long it lasts. By going to the larger pump, it can fill the buckets much faster, about 2 minutes or less compared to 10+ for the smaller one since it was struggling to push the water high enough. This, in turn is a pretty good trade off on battery life – slightly higher draw, but substantially reduced run time, lowering the amp hour capacity needed. The question will be if the solar panel can make up the draw used and recharge each day.
The filling problem turned out to just be stupid bad luck! I was adding water using the garden hose to time the buckets filling all the way and heard water trickling along side the house! Turns out the barrel got a crack in it! I am not sure when, but with a little duck tape, all is now well. We had a shower last night and added about 4 inches of water in the barrel!
Now to let it run again for a few days to see if my luck holds.
Tags: rain barrel
Rain Barrel control
Mar 7, 2011 Rain Barrel
I think I now have a working control for the rain barrel, with a moisture probe. This will prevent watering if the ground is already wet. I have a new PC board made and tested and just waiting for the weather to break a bit to get the barrel hooked up to test it. If all goes well I will add the design info to the rain barrel page soon. The whole control is pretty basic with only one adjustment for the probe so it should be cheap and reliable. Just don’t expect any bells and whistles.
Number of View :3393Tags: controller, electronics, rain barrel
Automatic Rain Barrel
Feb 7, 2011 Rain Barrel
We have a small garden out by our shed. It is not very big, sort of a “Square Foot Garden”. Just enough for some tomatoes, a cucumber and a few other plants. Of course one big key to a good garden is consistent watering, and of course I am a bit lazy and not very consistent. I wanted something to do it for me automatically.
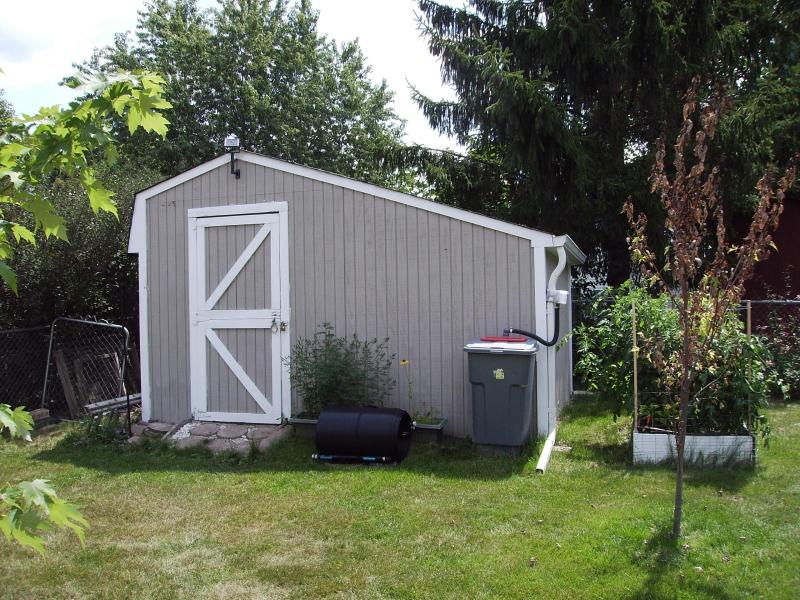
The shed is about 50′ from the house, not far, but far enough to have to drag out a big hose. Living in a cold climate, the obvious solution do not work well here. I could not simply bury a hose without worrying about draining it so it will not freeze. I also did not want to bury any wire for automation either. I needed something that would stand alone, self power and supply water.
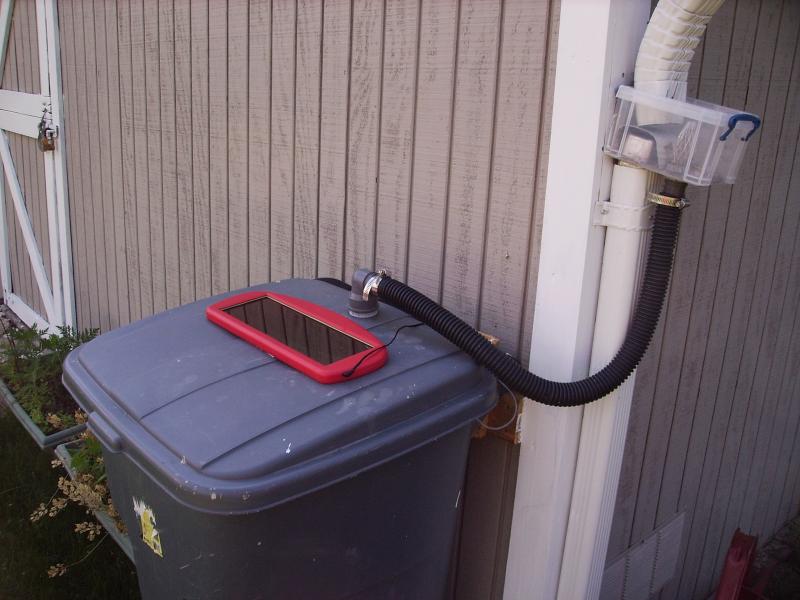
I decided on a rain barrel to attach to my shed. I simply used a 50 gallon trash can. I am not using the water for direct consumption, only irrigation. The first one was a heavy duty one some one had thrown away. (You can only use 35 gallon max for garbage here, so I could not use it for that) I lined it with a heavy 55 gallon “contractors” bag to keep the water clean and so it could be replace for easy cleaning. To hook it up to the gutter on the shed I made my own diverter/screen. (More on that later) The roof is about 10′x15′ and can fill the barrel with a moderate rain fall.
Tags: controller, electronics, rain barrel


