Under Slab Vent Repair
Jun 28, 2009 Home Projects
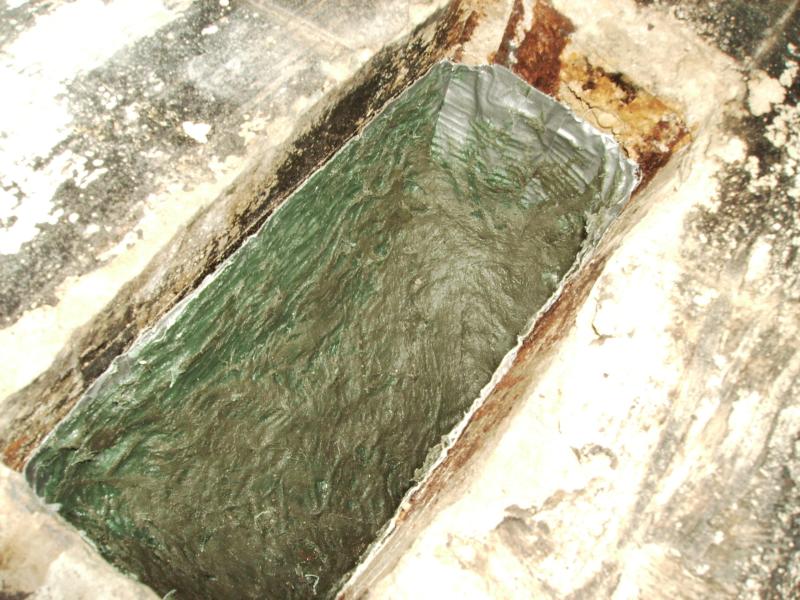
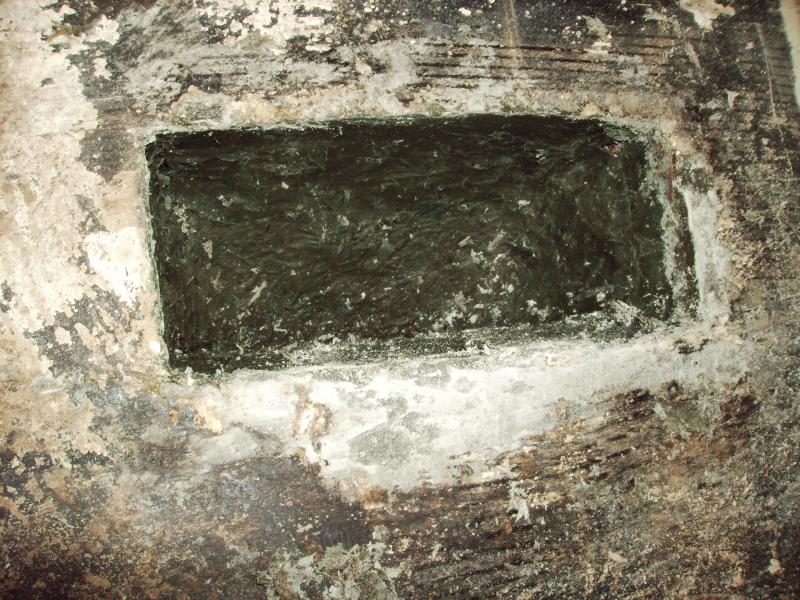
| While remodeling my bathroom I discovered a problem I suspect many face – a rusted out HVAC vent that runs under the slab.Now in a house with a basement or crawl space this would not be a big deal to repair. Accually it would probably never happen! I my case though, the vent is basically buried in dirt and in addition to being right next to the tub (and being flooded a few times I suspect) it rusted completely away. |
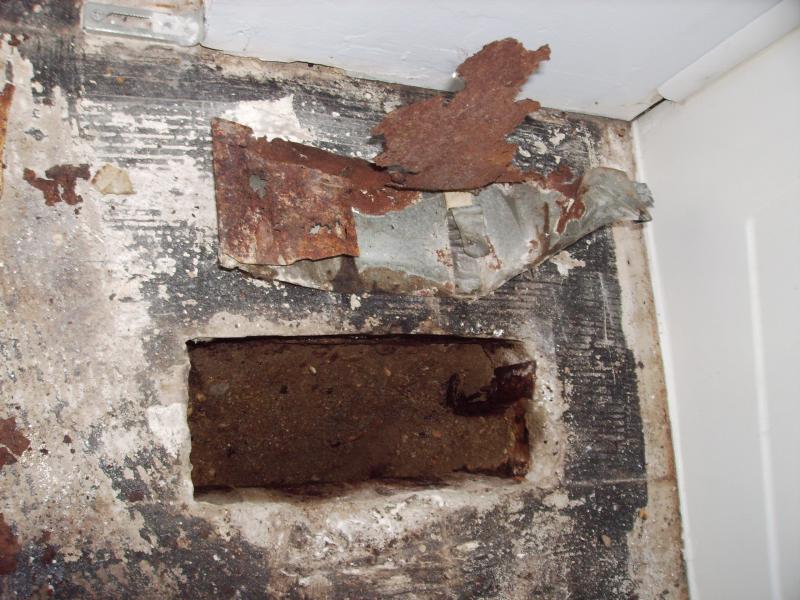 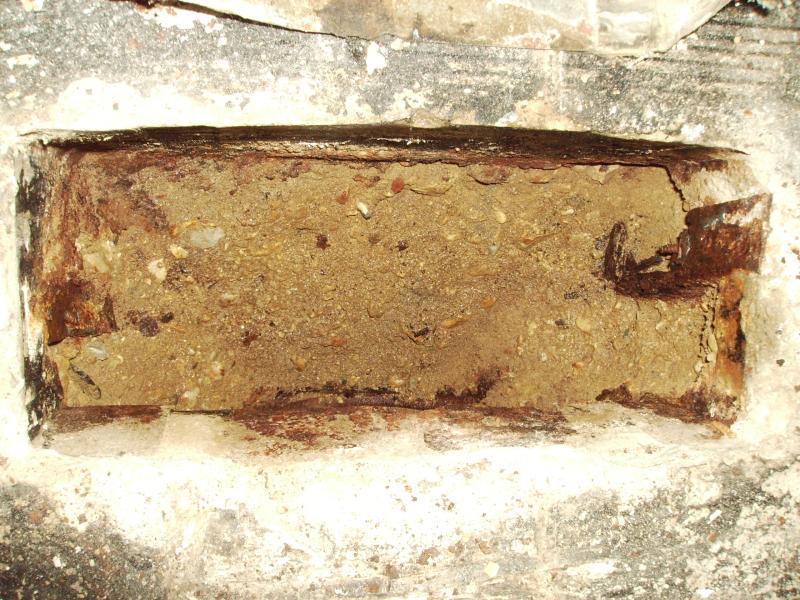 This probably explains where the occasional ant would come from every spring.The sheet metal was completely rotten, the only pieces left are the seams that were imbedded in the concrete. You can see the bottom is just sand, gravel and dirt. the Pipe it was connected to was rusty as well, but still had enough integrity to be OK (thank goodness!!) This probably explains where the occasional ant would come from every spring.The sheet metal was completely rotten, the only pieces left are the seams that were imbedded in the concrete. You can see the bottom is just sand, gravel and dirt. the Pipe it was connected to was rusty as well, but still had enough integrity to be OK (thank goodness!!) |
| Once it was all ripped out I had to come up with a way of fixing it. Before I started tearing into it I thought I might be able to simply coat the inside with something like undercoating or “Liquid Duct Tape” I saw at the auto parts store. Once I found how bad it was this was no longer an option. The dirt in the hole was well packed, but very dry and crumbly. I had to come up with a way to stabilize it so I could perform a repair. |
| Enter Aqua Net! |
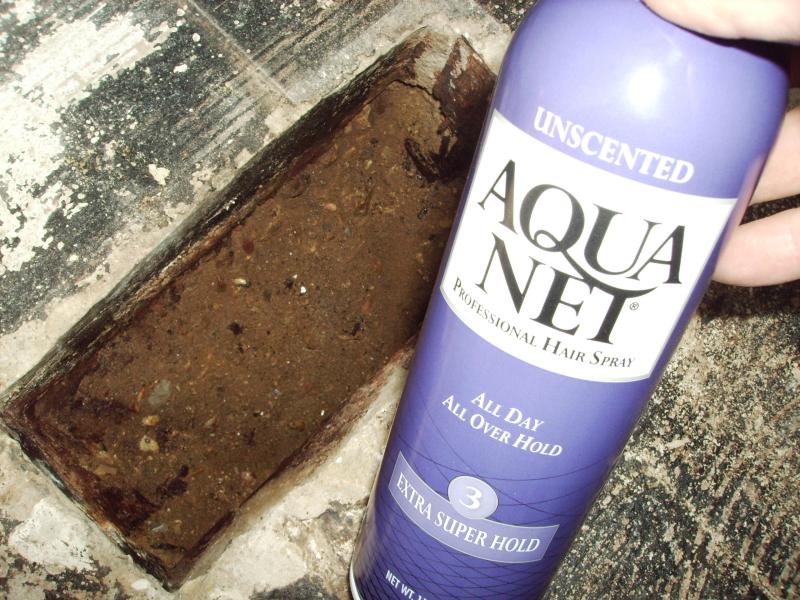 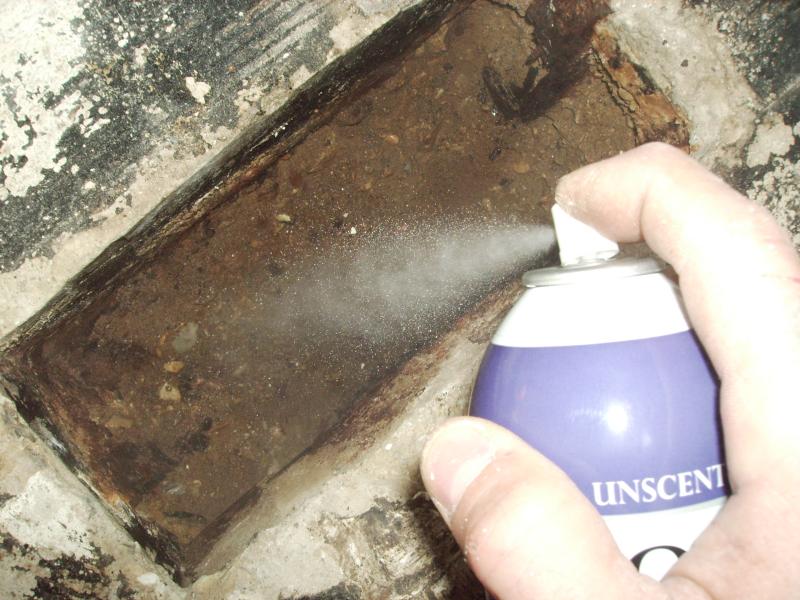 I gave it several heavy coats and let it dry well with some help of a hair dryer. The sandy portions mostly soaked it in, but it held enough to move on to the next step. I remember using hair spray to protect drawings stuff years ago, but the stuff today does not seem to be quite as good. Probably all the “environmentally friendly” stuff in it now.The next step was to create some form of mold or form to fill with what ever I was going to use to patch with. I gave it several heavy coats and let it dry well with some help of a hair dryer. The sandy portions mostly soaked it in, but it held enough to move on to the next step. I remember using hair spray to protect drawings stuff years ago, but the stuff today does not seem to be quite as good. Probably all the “environmentally friendly” stuff in it now.The next step was to create some form of mold or form to fill with what ever I was going to use to patch with. |
| Enter Duct Tape! |
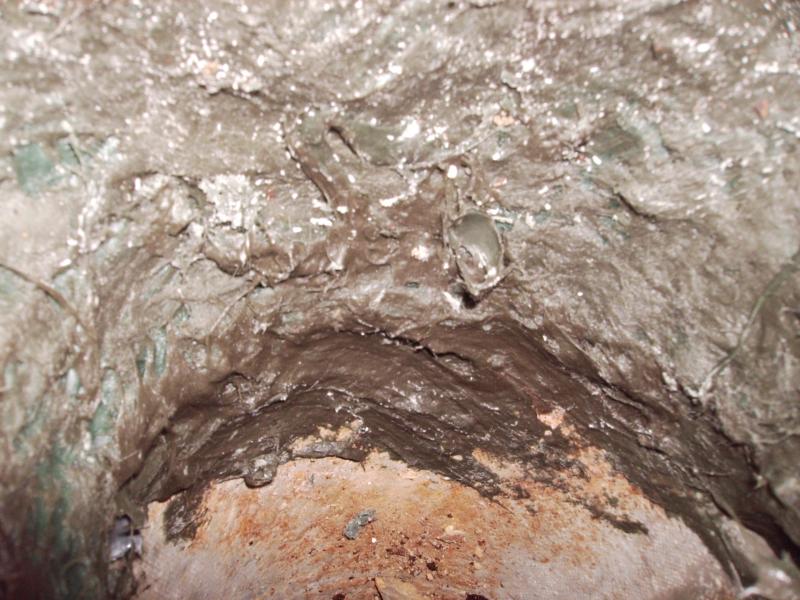
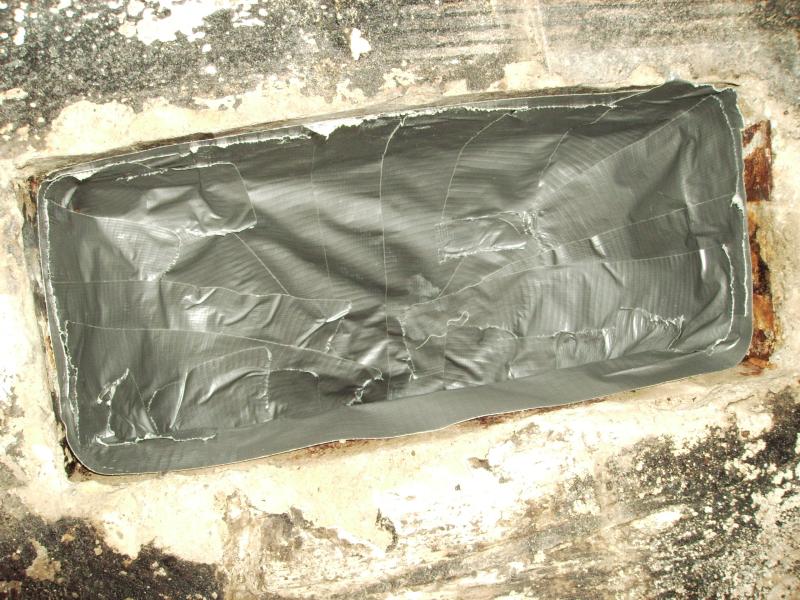 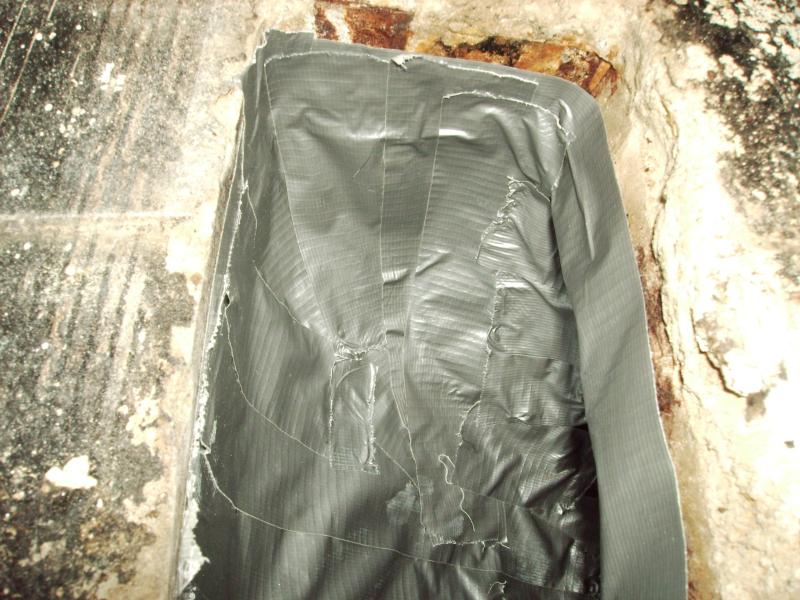 I lined the inside of the hole with duct tape being careful not to disturb the soil. I allowed it to slightly overlap the duct still intact and up the sides of the concrete. I then cut an even edge around the top about 3/4″ or so down to allow the patch something to seal to. I did not cover the top area under the slab since it was free of dirt and formed to the old piece of duct. I lined the inside of the hole with duct tape being careful not to disturb the soil. I allowed it to slightly overlap the duct still intact and up the sides of the concrete. I then cut an even edge around the top about 3/4″ or so down to allow the patch something to seal to. I did not cover the top area under the slab since it was free of dirt and formed to the old piece of duct. |
| Now to decide what to cover it with. In a pinch I could have just left the duct tape and called it a day. It is “duct tape” after all! This didn’t sit well with my scene of “do it right once” so on the the next idea. I debated about using fiberglass mat and resin, but knew it would be a sloppy mess, especially upside down. You may also know that fiber glass doesn’t stick well to duct tape (or dustly concrete) and I wanted to do this in one shot without any gaps. |
| Enter Bondo! (can you scense a theam here?) |
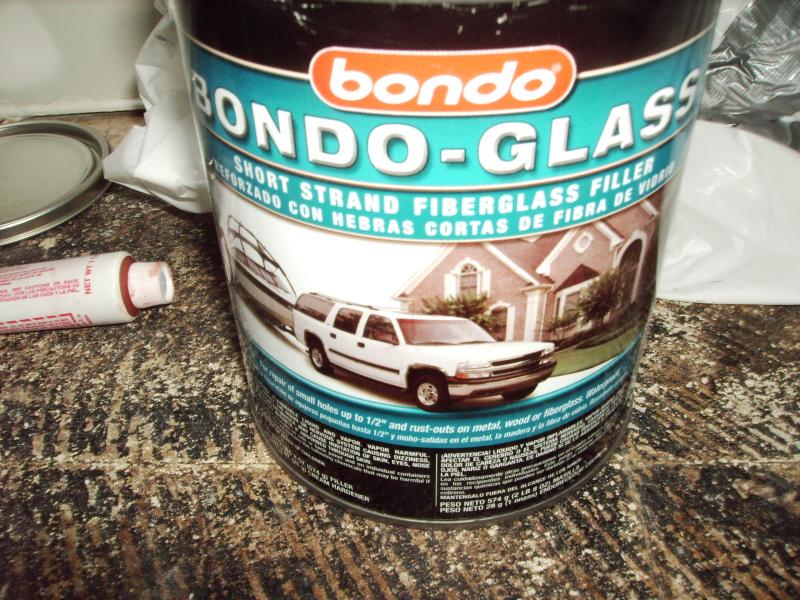 And not just any old bondo but Bondo-Glass reinforced with fiberglass fibers. It works just like ordinary bondo, but turns sort of black when you mix it instead of pink. since it is reinforced it is much more ridged than normal Bondo. This can was bought at the local big box and must have been setting on the shelf for a while. When I opened the hardener all I got was “juice”. Even after kneading it for a few minutes it was still runny on the first mix. After some was used and there was room in the tube, I kneaded some more and it started to look more like past. Because of this the first layer took a lot longer to harden that normal. I mixed about 1/6th-1/5th of the can at a time. And not just any old bondo but Bondo-Glass reinforced with fiberglass fibers. It works just like ordinary bondo, but turns sort of black when you mix it instead of pink. since it is reinforced it is much more ridged than normal Bondo. This can was bought at the local big box and must have been setting on the shelf for a while. When I opened the hardener all I got was “juice”. Even after kneading it for a few minutes it was still runny on the first mix. After some was used and there was room in the tube, I kneaded some more and it started to look more like past. Because of this the first layer took a lot longer to harden that normal. I mixed about 1/6th-1/5th of the can at a time. |
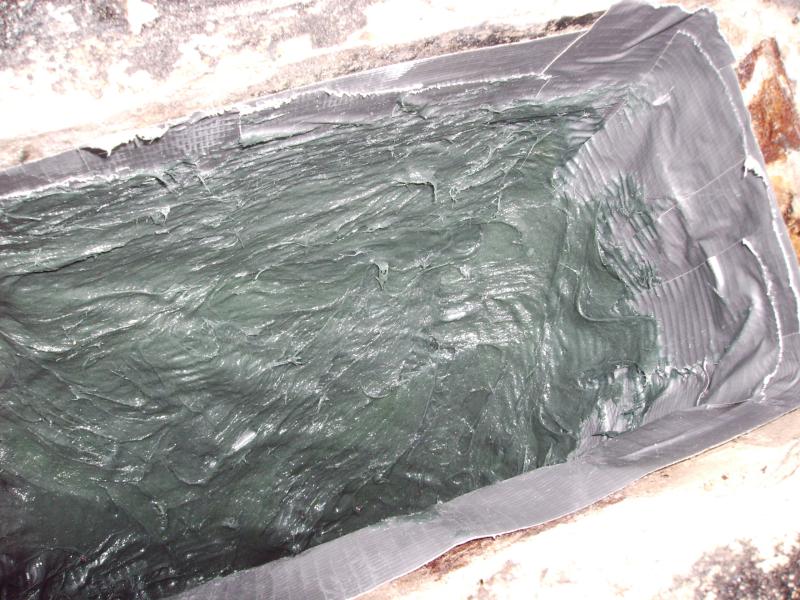  The first coat was mainly to cover as much area as I could to give the tape some rigidity. The first coat was mainly to cover as much area as I could to give the tape some rigidity. |
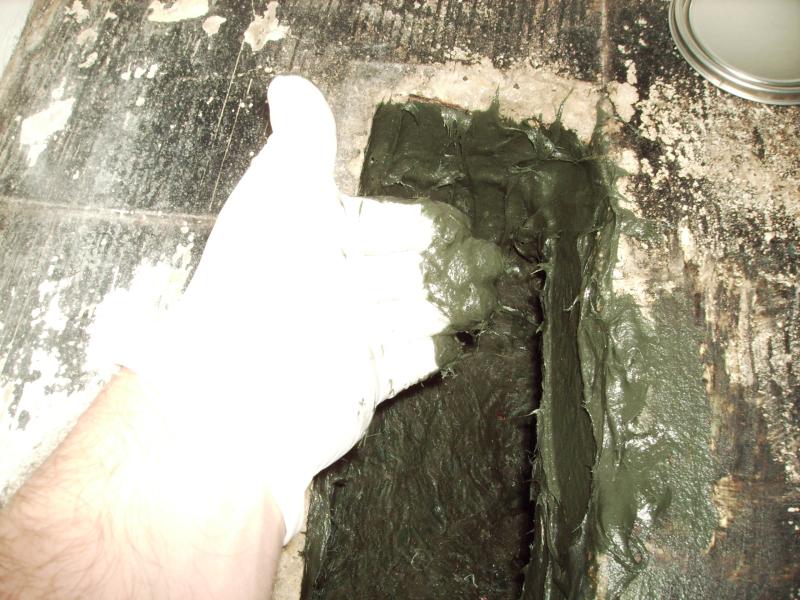 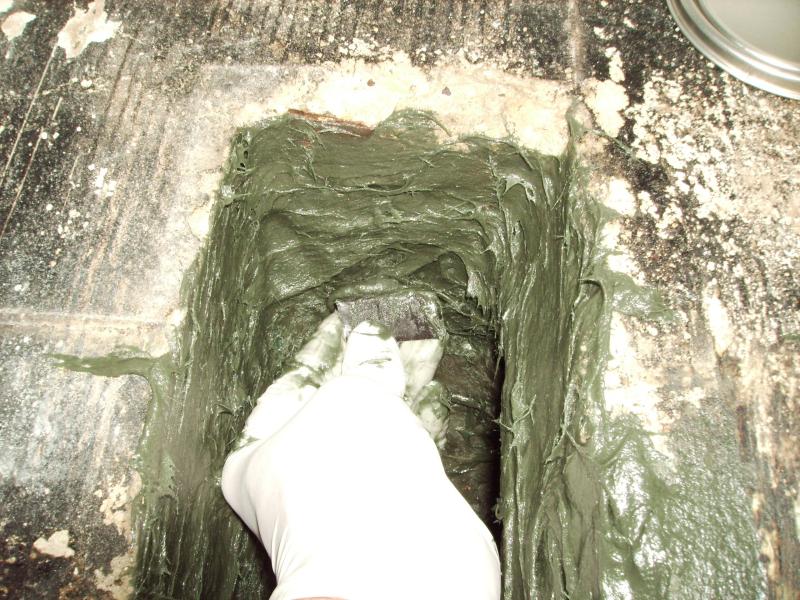 I started by slathering the Bondo in place by hand (wearing gloves) working it around all the edges and the top of the opening. Once I had a good base in place I started to smooth it out using a small piece of cardboard as a spreader. The gloves of course did not prevent me from getting Bondo stuck in the hair on my wrist! Notice I also filled a large chunck missing in the edge of the concrete. It was pretty big so it was done in several coats so it would not ooze down the side. I started by slathering the Bondo in place by hand (wearing gloves) working it around all the edges and the top of the opening. Once I had a good base in place I started to smooth it out using a small piece of cardboard as a spreader. The gloves of course did not prevent me from getting Bondo stuck in the hair on my wrist! Notice I also filled a large chunck missing in the edge of the concrete. It was pretty big so it was done in several coats so it would not ooze down the side. |
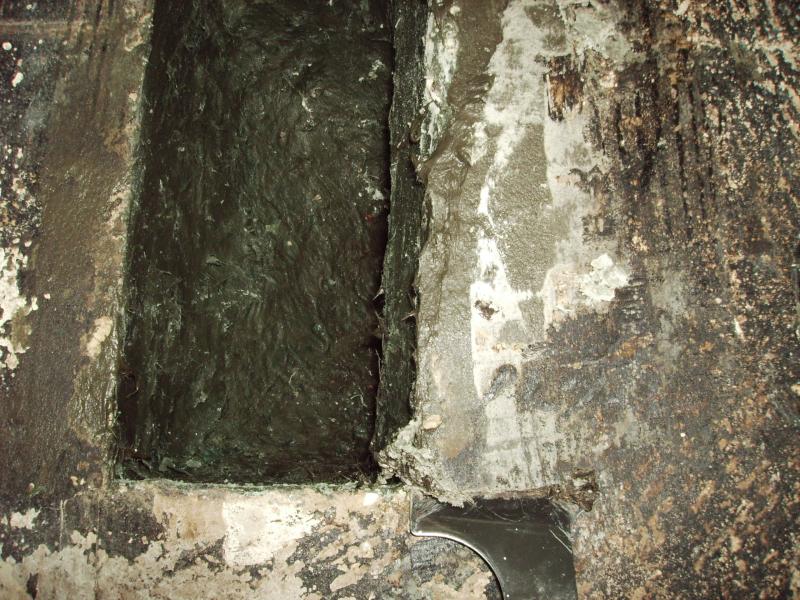  Anyone who has used Bondo knows the best time to trim the excess is just before it is completely hard. Normally you would use a “cheese grater” when working on a fender, but in this case I just scrapped everything level with a sharp paint tool and knocked of the lumps around the inside edge. The inside is not perfectly smooth, but then again life isn’t either. Anyone who has used Bondo knows the best time to trim the excess is just before it is completely hard. Normally you would use a “cheese grater” when working on a fender, but in this case I just scrapped everything level with a sharp paint tool and knocked of the lumps around the inside edge. The inside is not perfectly smooth, but then again life isn’t either. |
 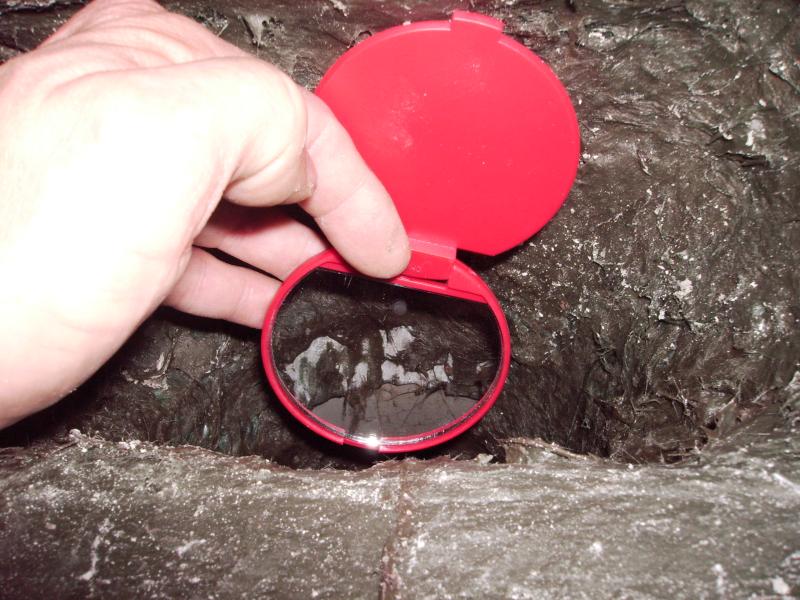 Here you can see how far I over lapped the old pipe and how rusty it is. (Hope my girlfriend doesn’t know I used her compact!) Here you can see how far I over lapped the old pipe and how rusty it is. (Hope my girlfriend doesn’t know I used her compact!) |
  Swept clean and test fit. Swept clean and test fit. |
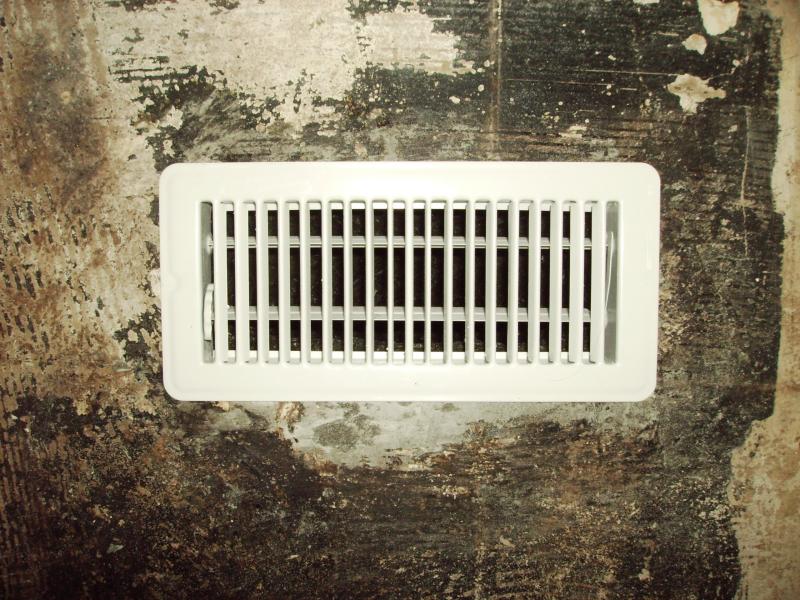
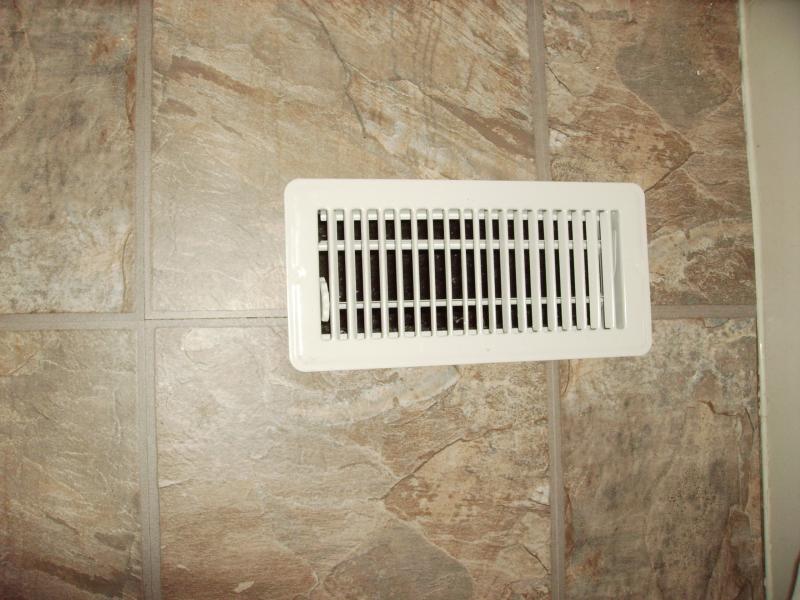 All Done! All Done! |
Tags: under slab, vent repair


